
Raiza Newberry-Quiroz
In our fourth installment of the design challenge series, Kevin shows us what 20 years of product development experience looks like. And Raiza is put to the test to learn CAD.
Below are Kevin‘s and Raiza‘s experiences and the outcome of their design challenge.
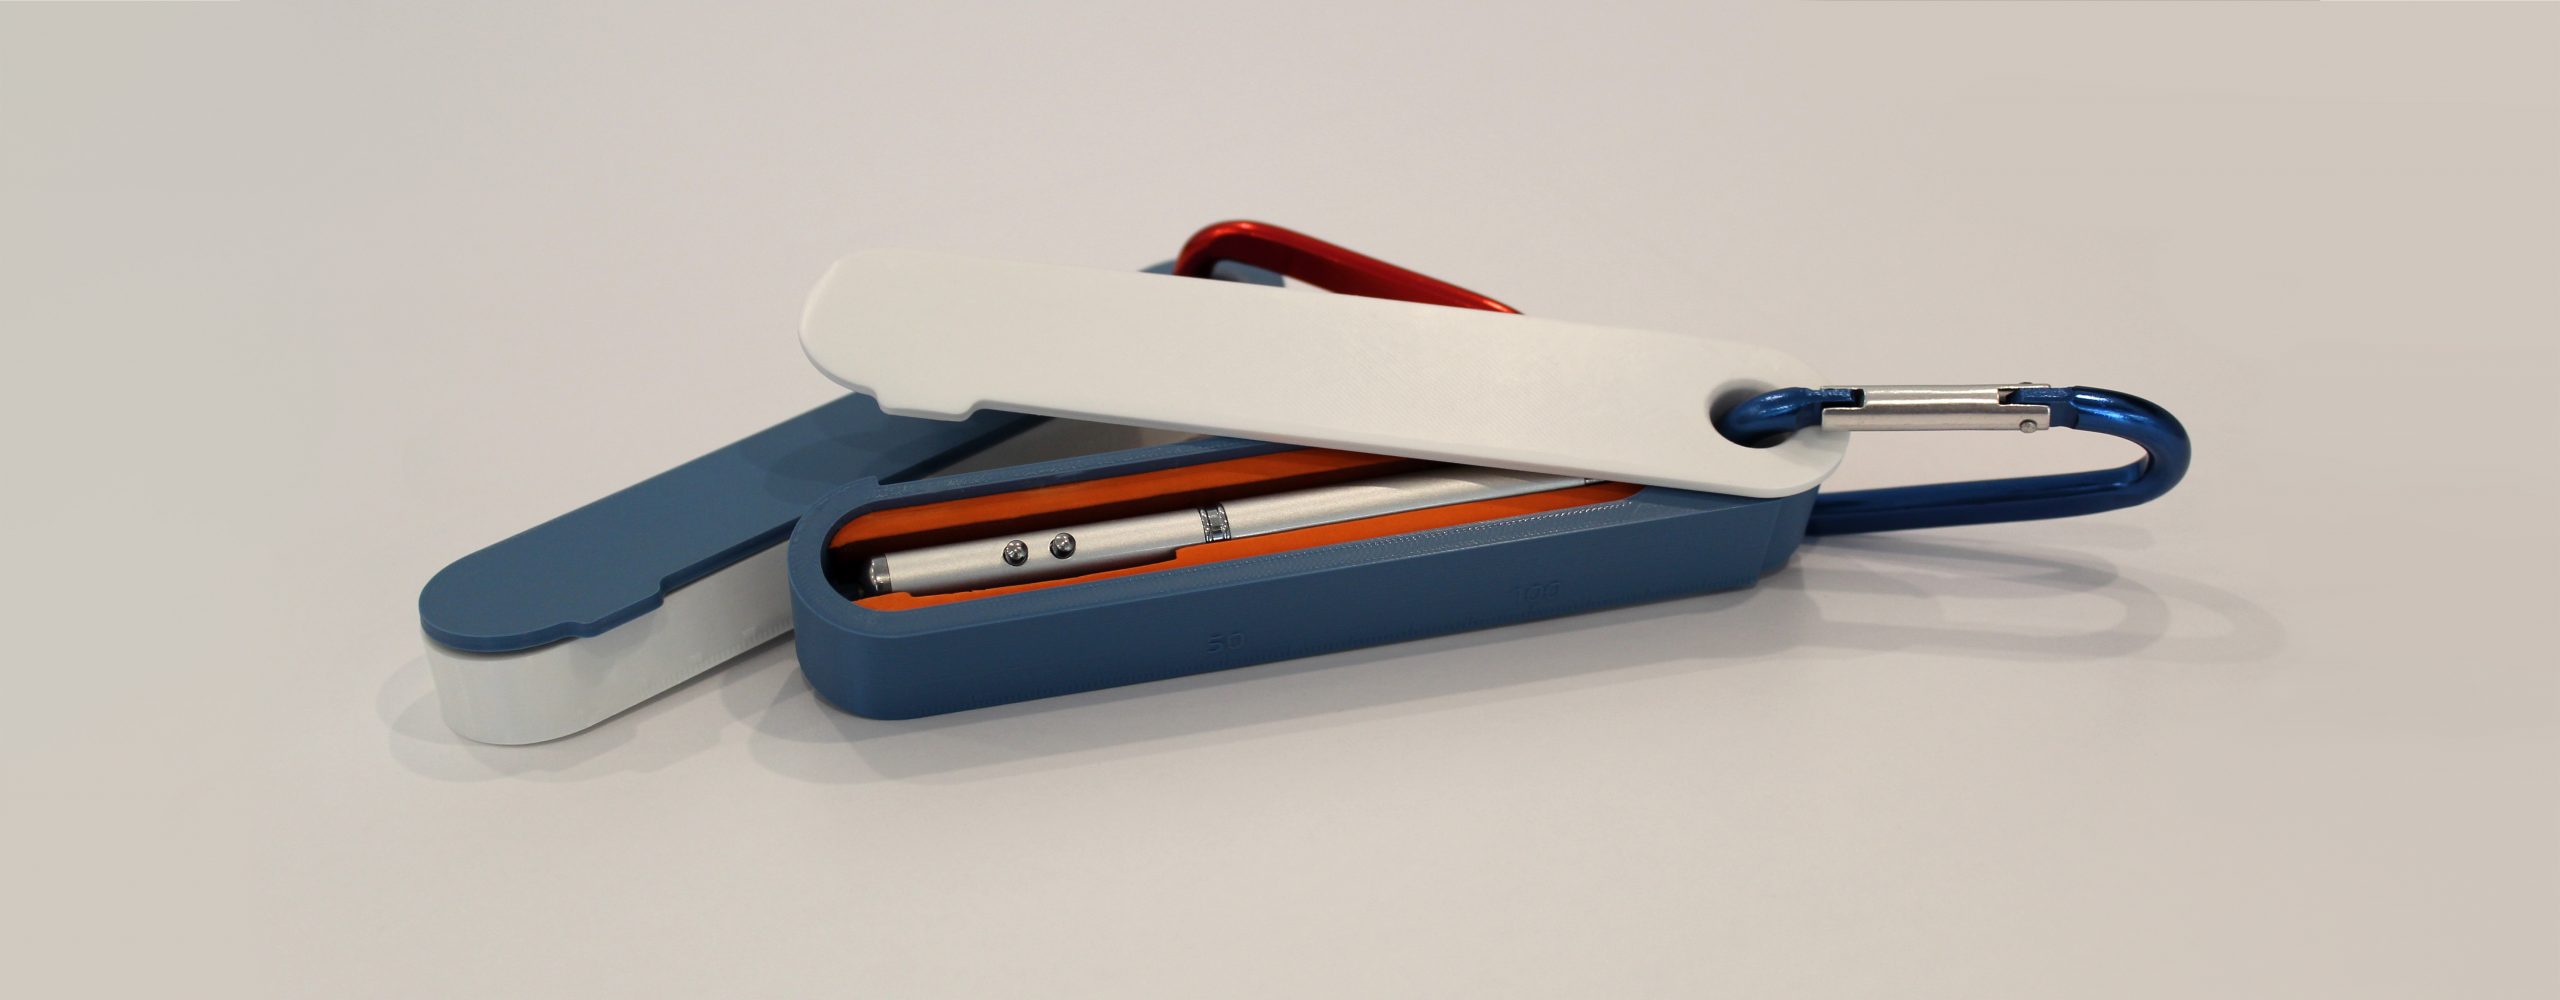
Kevin’s Box
Who is your client or intended user?
I designed it for me. Ultimately, I think someone who values multi-function design would appreciate the box.
What tools does your toolbox hold?
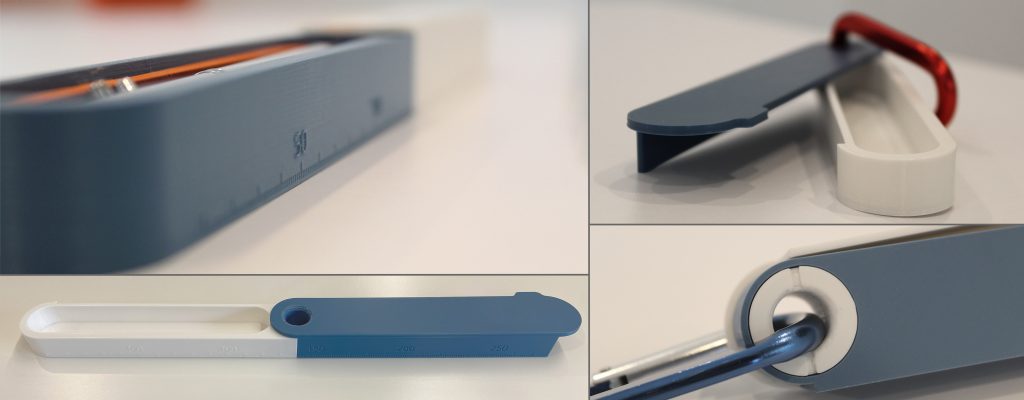
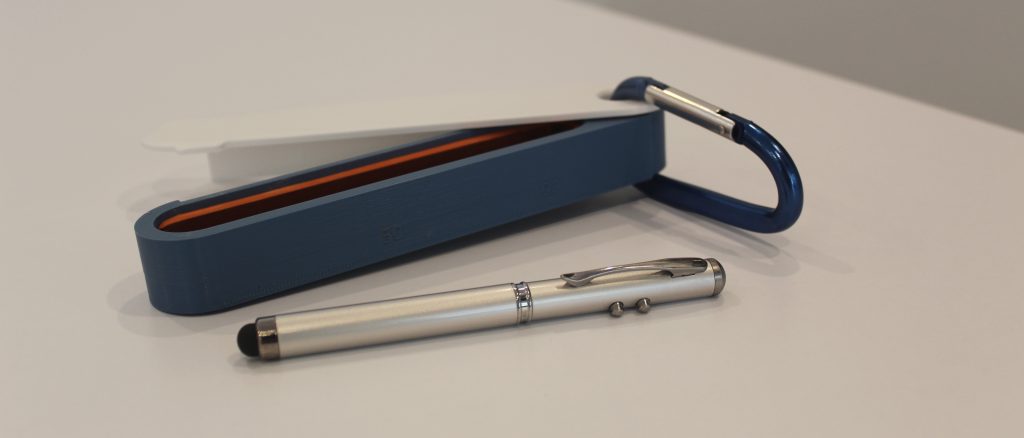
The purpose of this case is to display a versatile multi-functional tool (such as the one I utilized, which combines a pen, laser pointer, and touch screen stylus). The case has secondary functions such as an integrated ruler and indexed opening positions that stop in 45-degree increments (so you can use it as a tool to help with drawing).
Describe your design process in developing the toolbox:
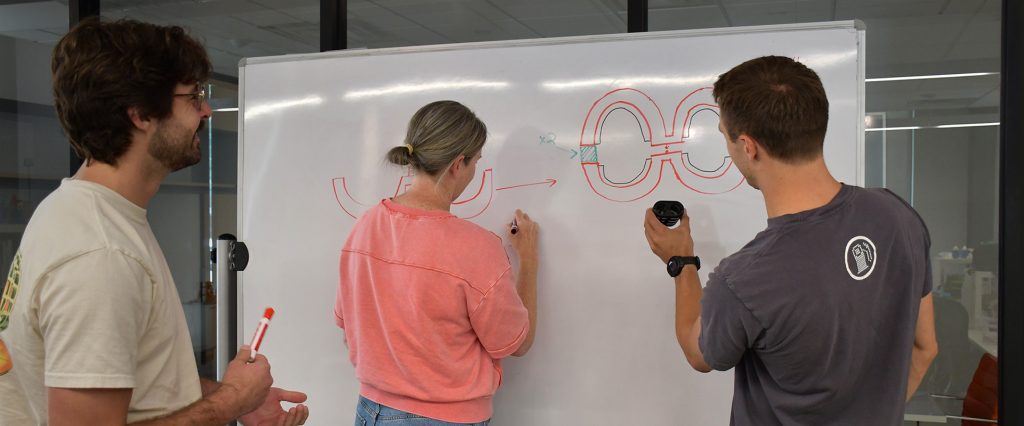
My process is a bit different than most. I like to daydream about the interactions and motion of the mechanisms to see what will be most interesting and give a “wow” experience. Once I had a vision of how I wanted the box to function, I started designing the mechanisms and assembly. My goal was to create a case where its motion was not readily apparent, evoking a sense of “mystery and magic” for the user. Prototyping helped me see additional opportunities (such as integrating the ruler and 45-degree increments).
What was the outcome, and how would you approach the problem if you started over?
I think that the outcome was positive. I wound up changing the mechanism from a spring-loaded over-center plunger to a simple, integrated, plastic leaf spring and detent, because the simpler mechanism wound up having a better tactile feel. Overall, I’m quite pleased with how it turned out.
If I had to start over, I would approach the problem in a very similar fashion. Having been in the product development world for over 20 years I have found a process that works well for me.
How does your box represent you as an engineer?
I take great pleasure in designing mechanisms and products that make people wonder “How does that work?” or “How does that go together?” I think that this case embodies both of those qualities.
Raiza’s Box
Who is your client or intended user?
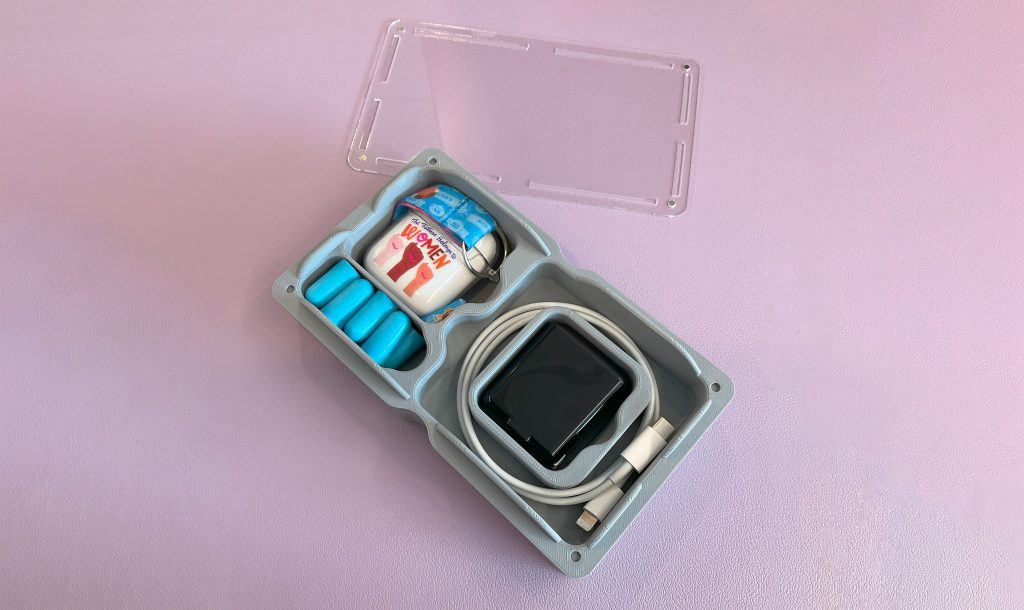
The intended user is, and was, 100% myself. I originally designed my toolbox because I noticed when I was traveling, I would misplace my charger or AirPods. I wanted to create a box that could travel with me and act as a station where my items could live once I arrive.
What tools does your toolbox hold?
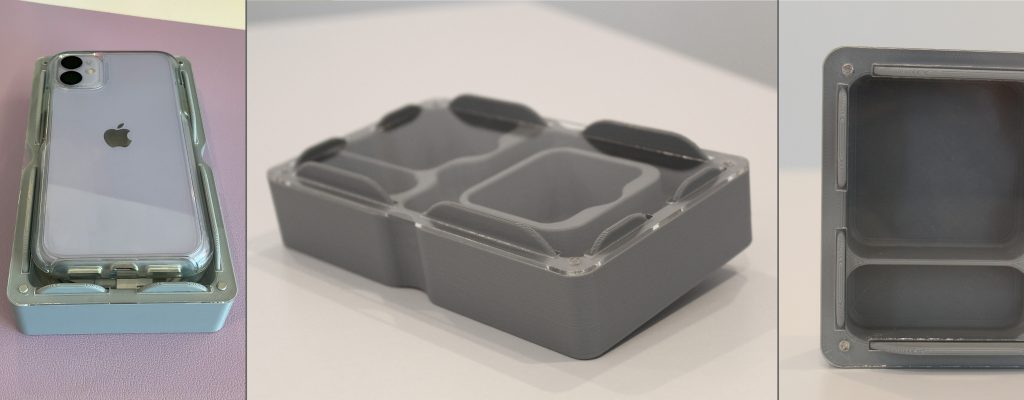
My box is a simple traveling case with pockets for each of my travel/bedtime essentials; my AirPods, earplugs, charging cable, and USB-C charging cube. The top of the box is an acrylic sheet that acts as a lid to retain the pocketed items and guard rails to allow my phone to sit and charge on top of the box.
Describe your design process in developing the toolbox:
Having never modeled anything in CAD before, I had no idea where to start. I just knew which items I wanted my box to be able to hold, and I knew I wanted a designated place for my phone to rest and charge at night. I made a rectangular prism that I cut away to form the pockets. Then I made everything smooth.
What was the outcome, and how would you approach the problem if you started over?
I still regularly utilize my box when I travel. The box does have some faults (occasionally I have to reglue a magnet in or rearrange my items so the lid can lay flat on the base), but I’m decently proud of all the skills I learned in the process. As a result, I feel really proud of my box. The only thing I would add is a grippy material to the bottom, allowing the box to lay on a bed sheet without slipping.
If I had to reapproach the problem, I think I’d create my toolbox out of a softer material, because packing such a rigid case can pose issues. I would sew a pouch out of a clear material, that would have multiple zipper pockets with an additional space for my phone to live.
What did you learn during the design process?
What didn’t I learn? Having never touched any CAD software before this and being the guinea pig for this project before the junior interns arrived, I learned so many new skills. I learned how to use Onshape and I learned what a fillet is. What more is there? Realistically, it was a great experience to get a deeper sense of what the engineers do (on a significantly scaled-down level).
Stay tuned in the upcoming weeks to see the final 2 boxes, that Peter and Parth created!
To download printable files for Kevin’s toolbox or boxes from a previous installment, visit our Thingiverse page.