
Raiza Newberry-Quiroz
In our final installment of the design challenge series, Peter thinks outside the box while exploring the parameters of an Altoids tin and Parth fills his toolbox to the brim to include his Raspberry Pi and accessories.
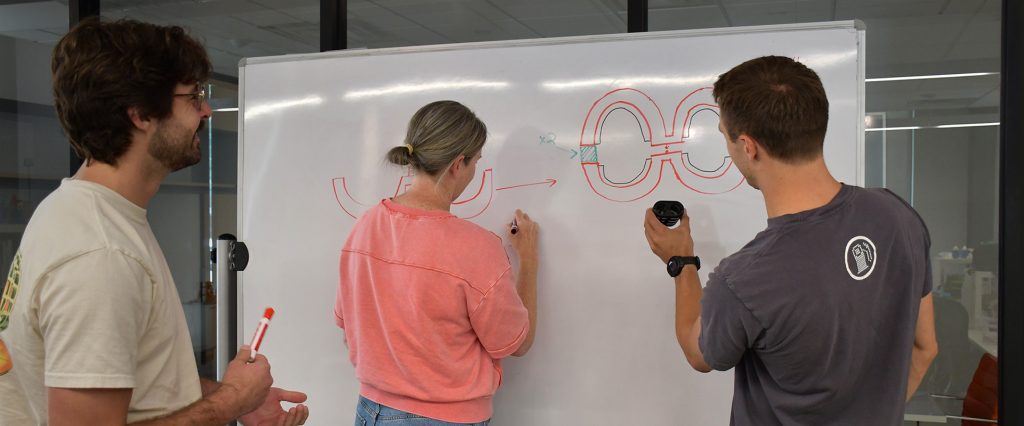
Below are Peter‘s and Parth‘s experiences and thoughts on their design challenge.
Peter’s Box
Who is your client or intended user?
The intended user is someone who loves organizing everyday carrying products and hates to throw away usable materials.
What tools does your toolbox hold?
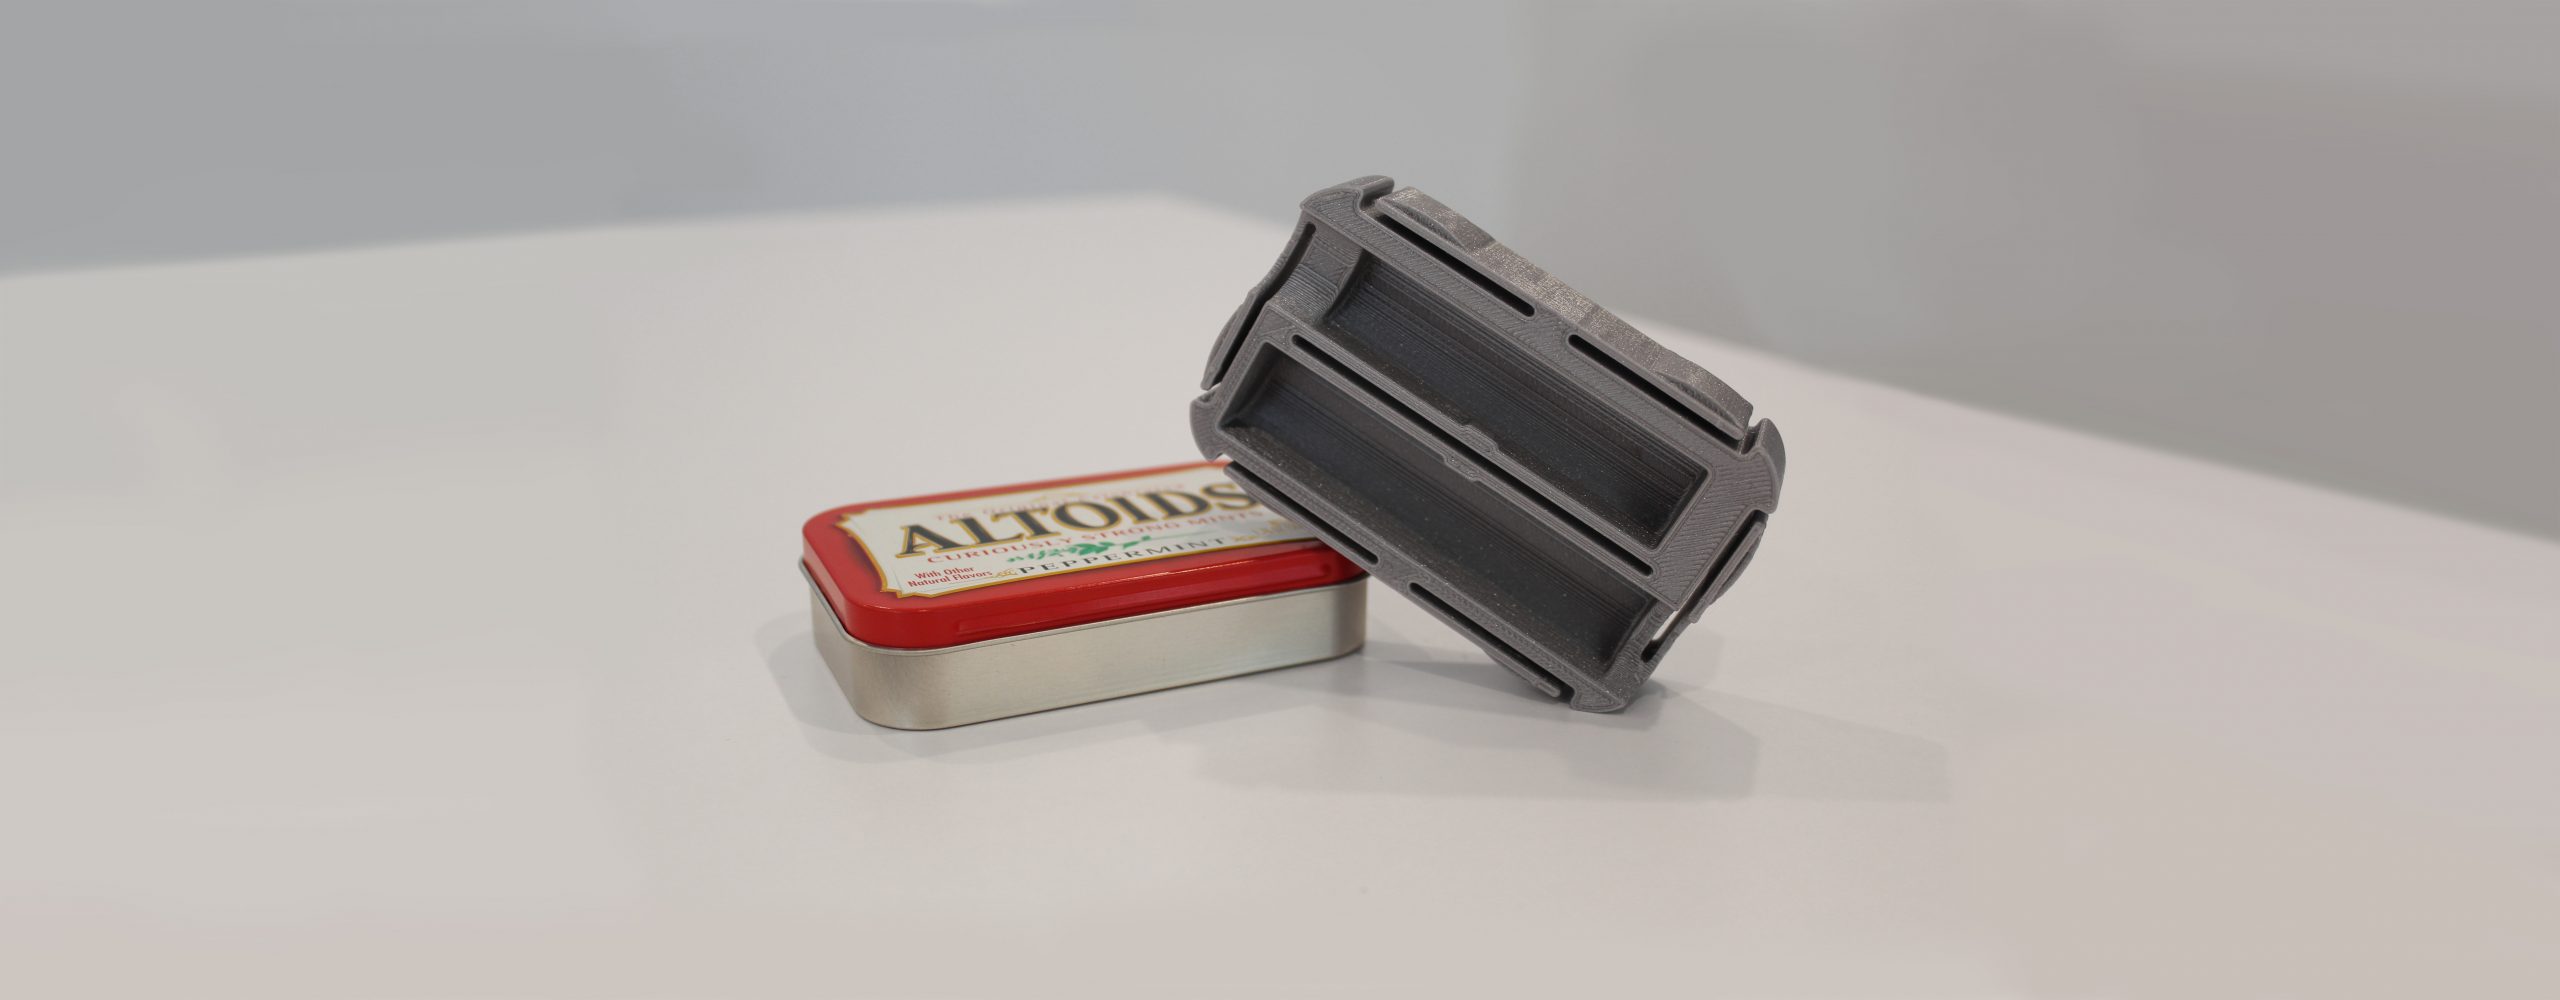
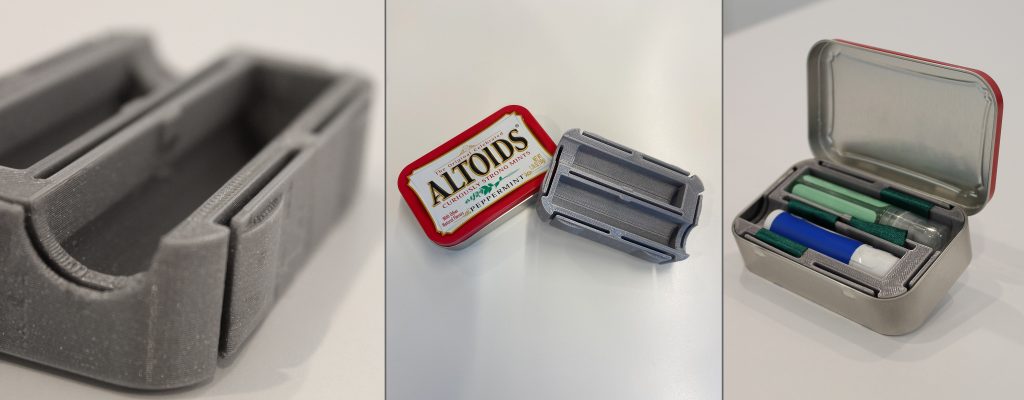
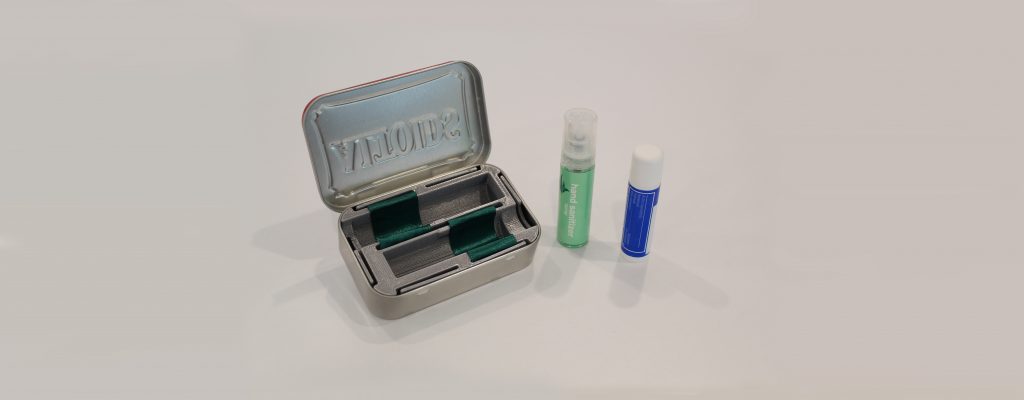
My toolbox repurposed an existing empty Altoids tin and holds a lip balm and hand sanitizer.
Describe your design process in developing the toolbox:
My family loves Altoids, and I’m a bit of a packrat, so I hate to throw away anything I can reuse. As a result, we have stacks of empty Altoids tins waiting for a project. When I started the design process, I wanted to make use of some of these tins and make a nice compact toolkit that can go in a purse, glovebox, backpack, suitcase, or wherever. Since I already knew what my outside package was, I switched to figuring out the internals. My goal was to keep the custom insert to a single piece. I designed an integrated snap feature that would go under the rolled edge of the tin, and two pockets with snaps to retain the two products. I also designed the insert to leave as much room for the tools and decoupled the snaps, retaining the insert from the tool pockets. This way I can design future iterations to hold different “tools”. I have already made another variation for my daughter that holds a compass and a small flashlight.
As with any project, it’s critical to have a good 3D representation of the off-the-shelf parts, so I modeled the tin, lip balm, and sanitizer, and began working around them. Since the insert is a single printed part, I was able to quickly iterate the snaps a couple of times and make sure the lid would close with everything in place. Once I was happy with the fit, I tested the overall assembly. I added a ribbon that runs under the two tools and aids in removal. Regardless of how much I dialed the snaps holding the lip balm and sanitizer back, they were always difficult to remove without the ribbon.
What was the outcome, and how would you approach the problem if you started over?
Given the time I spent on it, I’m happy with the outcome. With more time, I would iterate specific features to optimize printing time and make a blank template that can be easily modified to hold different tools.
If I were to start over, I would be interested in exploring other reused containers. The Altoids tin is a little small, and examples of durable, reusable packaging are all around us, often ending up in recycling bins and landfills.
How does your box represent you as an engineer?
This box represents two things I value. One is minimizing waste through reuse, and the other is to strive for simplicity. A single part, given enough thought and iteration, can provide most if not all the functionality needed in a simple product.
Parth’s Box
Who is your client or intended user?
I am the client and the intended user for this custom-carrying case. I needed a practical solution to easily transport all of the hardware I needed for a project (Raspberry Pi and accessories), and carrying them and a laptop around loosely to multiple weekly meetings was becoming tedious. This case was created to simplify my experience by providing a dedicated and organized solution for my specific needs.
What tools does your toolbox hold?
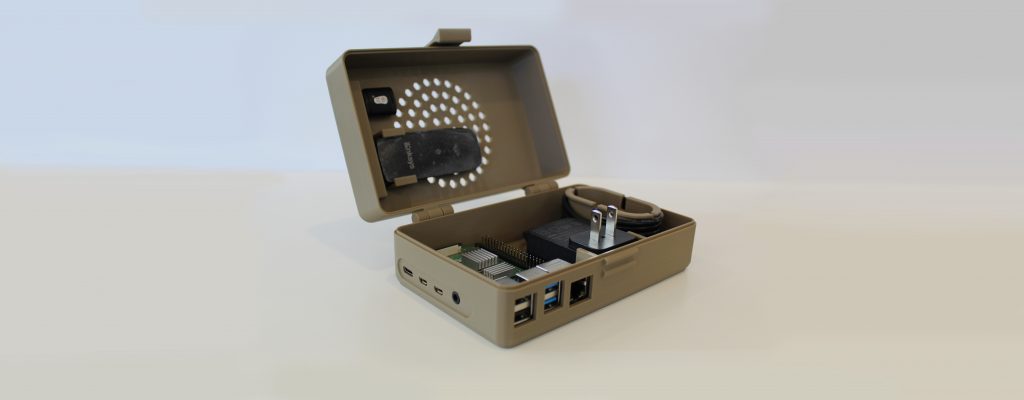
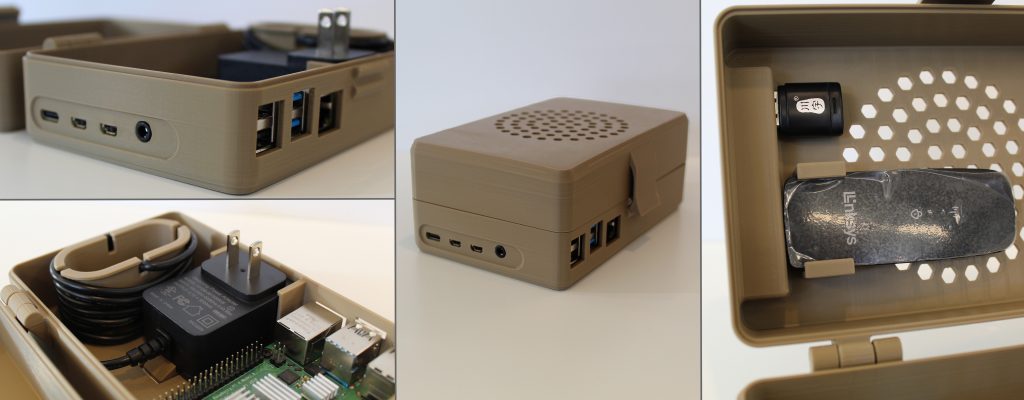
This container accommodates a Raspberry Pi, a power adapter, a Wi-Fi dongle, and a MicroSD card reader.
Describe your design process in developing the toolbox:
My design process began with gathering all the accessories I intended to include, measuring, and modeling them in Solidworks. I then started arranging all the accessories within the volume requirement set for the design challenge, until I achieved a configuration that met my expectations.
Beyond creating a convenient carrying case, I also aimed to design a functional Raspberry Pi case that allowed me to use the Pi without needing to remove it while still providing access to all of its ports.
The next step was figuring out how to mount each accessory within the box. I designed distinct mounting features for each item. To secure the Raspberry Pi, I opted for heat-set inserts and screws, while a snap mechanism was used for the power block, enabling easy removal and secure attachment. The Wi-Fi dongle and the MicroSD card reader were secured using a friction-fit method. To connect the lid to the base, I incorporated print-in-place hinges and a snap closure to seal the box securely. This meticulous process ensured that all components were not only securely housed but also readily accessible and easily transportable.
What was the outcome, and how would you approach the problem if you started over?
Overall, I’m quite satisfied with the outcome of the toolbox. However, I know I could have spaced out the components better if I had a slightly larger volume to work with. It took a few iterations, and I had to print multiple versions to fine-tune the fit and feel of all the design features. Despite the challenges, the end product is a well-organized and functional solution for carrying and using the Raspberry Pi and its associated accessories.
How does your box represent you as an engineer?
This toolbox is a snapshot of my engineering style, featuring problem-solving, precision, technical know-how, a sprinkle of creativity, and a pinch of patience. It’s a tangible testament to my commitment to making engineering practical and innovative.
This article concludes our design challenge series. Thank you for following along with us throughout this experience.
To download printable files for Peter’s toolbox or some of the other toolboxes featured in our previous articles, visit our Thingiverse page!