
Raiza Newberry-Quiroz
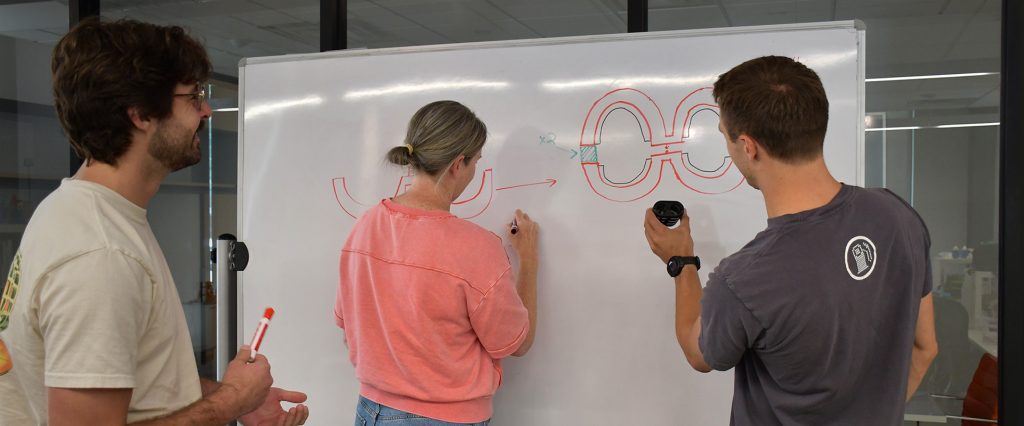
In preparation for our two junior interns this summer, we tested their design challenge on ourselves. In our third installment of the series, we explore Robert and Abhi’s designs.
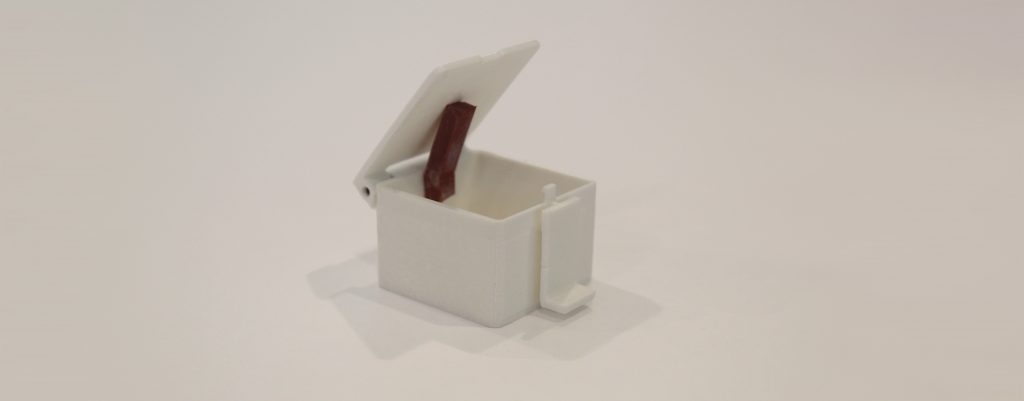
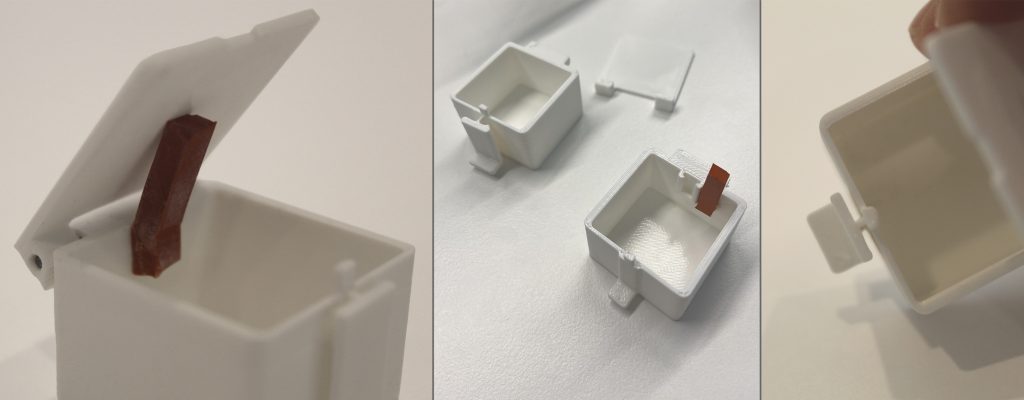
Robert’s Box
Who is your client or intended user?
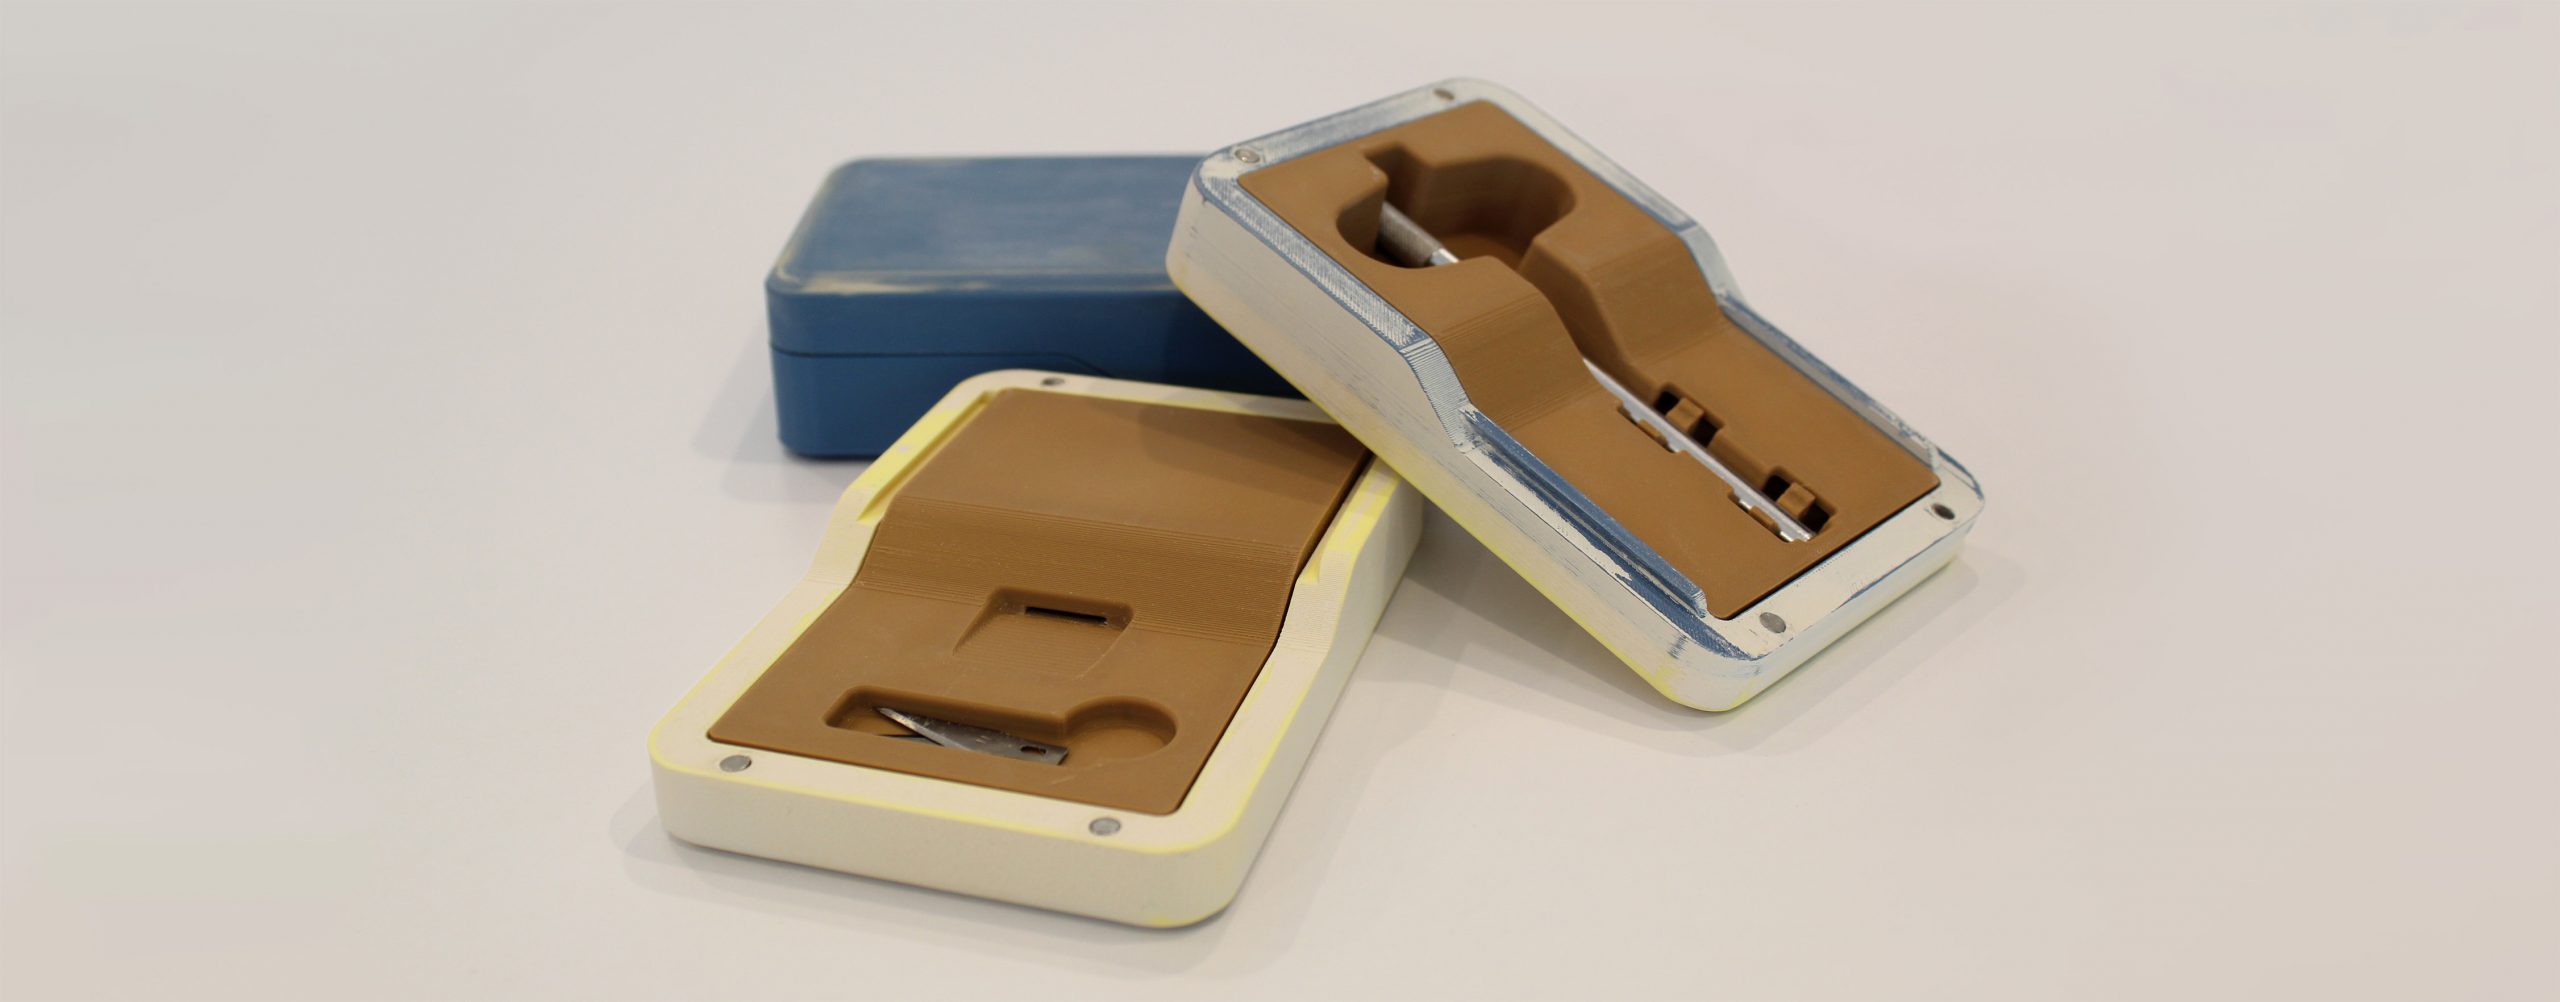
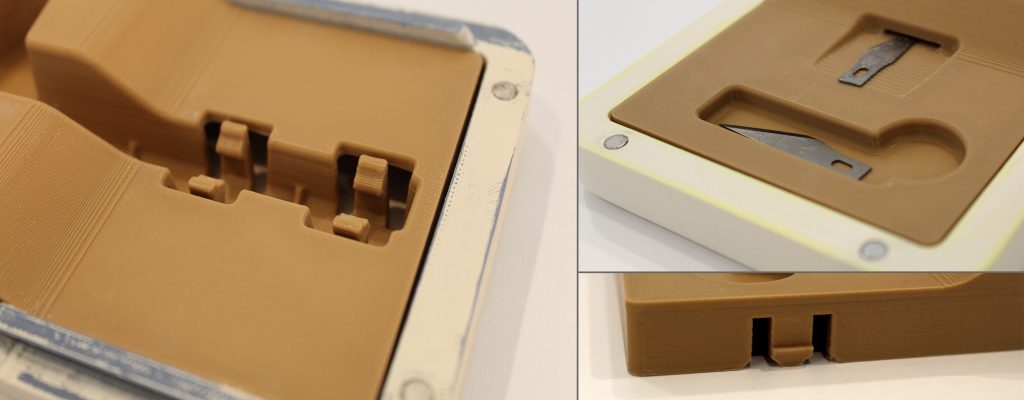
Before creating my box, I owned this little Harbor Freight X-acto knife set with multiple handle storage. The handles jiggle around and get loose, and I only ever need one handle at a time. I wanted to create a toolbox that would hold one handle, a place to dispose of spent sharps and protect a user from having to dig through a tray of sharps when working in their workshop. Essentially, the intended user was me or someone like me who does some sort of crafting and uses an X-acto knife.
What tools does your toolbox hold?
My box is a two-part system that holds an X-acto knife, new blades, and a location for spent sharps.
Describe your design process in developing the toolbox:
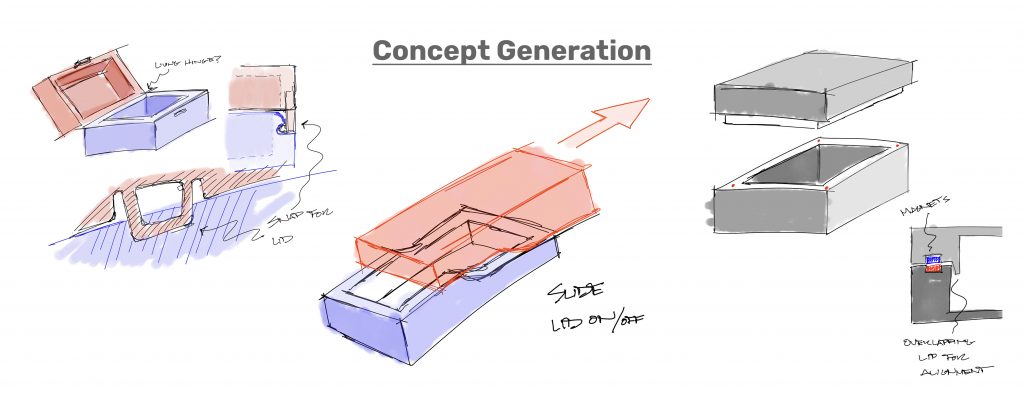
For my design process, I thought of function and aesthetics separately. I wanted to make something that ultimately could support different configurations on the inside with the same outer shell. I started with the overall concept, brainstorming until I had an idea I liked. Once I knew what I was designing, I worked on the aesthetics by sketching out some designs for the exterior. From there I began working on the cosmetic surfaces and overall architecture in CAD. I start my master model with the outside cosmetic surface and the major parting lines. In addition, I modeled the things I planned to go inside so I could move them around to find the orientation I liked and how they would fit in the box. Finally, I built the functional features. I went through two or three iterations to get the snaps in a good place. I tried detents to be able to hold the box pieces down against each other, then I screwed around with magnets (I used four in the final version). The disposal slot for sharps wasn’t in the original design. I had some space to work with and Libertad had mentioned it would be nice to have a place to put your used sharps.
What was the outcome, and how would you approach the problem if you started over?
I’m pretty happy with the outcome. In the future, I’d like to make more inserts for the exterior shell, and see what other shop additions I could make.
If I were to start all over again, I would probably add a feature allowing the user to open up and dispose of the sharps. I would also have some sort of touch point or indicator that gave a suggestion of how to open the toolbox if you didn’t inherently know which way to slide it.
How does your box represent you as an engineer?
I enjoy working on system architecture. It’s something I don’t have an opportunity to do as often with client work. But, I’ve always been interested in hearing what drives the decisions for architecture and industrial design elements. With existing products, I find it interesting to figure out what architecture makes the most sense from both a user experience and business perspective.
Abhi’s Box
Who is your client or intended user?
This toolbox could be utilized by anyone, like myself, who has to take pills every day and has to carry them around. A single-day box makes it easier for people to carry their pills around and not have to use something like a plastic baggie.
What tools does your toolbox hold?
Pills, medicine. Small things you need to carry for the day.
Describe your design process in developing the toolbox:
Because this was meant to be used as an example piece for the junior interns, I wanted to make my toolbox as simple as possible with the least amount of parts. When designing, I started with the structure of the box and how the lid would open and close. I realized that I needed some sort of locking mechanism, so I planned for the printed PLA to deform to create the locking engagement. To pop open the lid after unlocking, I just used a piece of rubber that has some flex to it in place of a conventional spring. I wanted to encourage the junior interns to think outside the box because back at school they might not have access to a collection of hardware and other things that we do in our shop. I wanted to demonstrate that things can be very simple and still very user-friendly. The last feature I added was a hard stop on the lid.
What was the outcome, and how would you approach the problem if you started over?
I did take the box home one day, (it’s a 3D-printed box made out of PLA), and I quickly realized that PLA melts in your car during the Texas summer! Because my original box melted in the car, and I’ve missed having it, my next step would be to find a more convenient way to transport it, or I would find an alternative material and process (machined or injection molded), so it wouldn’t melt if forgotten in the car.
If I started over I would make it slightly bigger (one of my pills didn’t fit). I would also touch up the locking mechanism to make it a bit more robust(it was a very tiny feature so I would probably make it a bit bigger so that it doesn’t wear off over some time). I might even consider making the lid out of the same part of the base, with a living hinge. This would eliminate the use of a dowel pin, reducing one more part and requiring only one mold, to help make the part cheaper.
How does your box represent you as an engineer?
I favor simplicity. My advice is, if it’s not required, don’t make it complicated. I always try to not over-engineer things and keep them on the cheaper side. It takes skill to design things simpler but still function as required, and have a good user experience.
Stay tuned in the upcoming weeks to see the remaining 4 boxes our team created!
To download printable files for Robert’s toolbox, visit our Thingiverse page.