
Kevin Keller
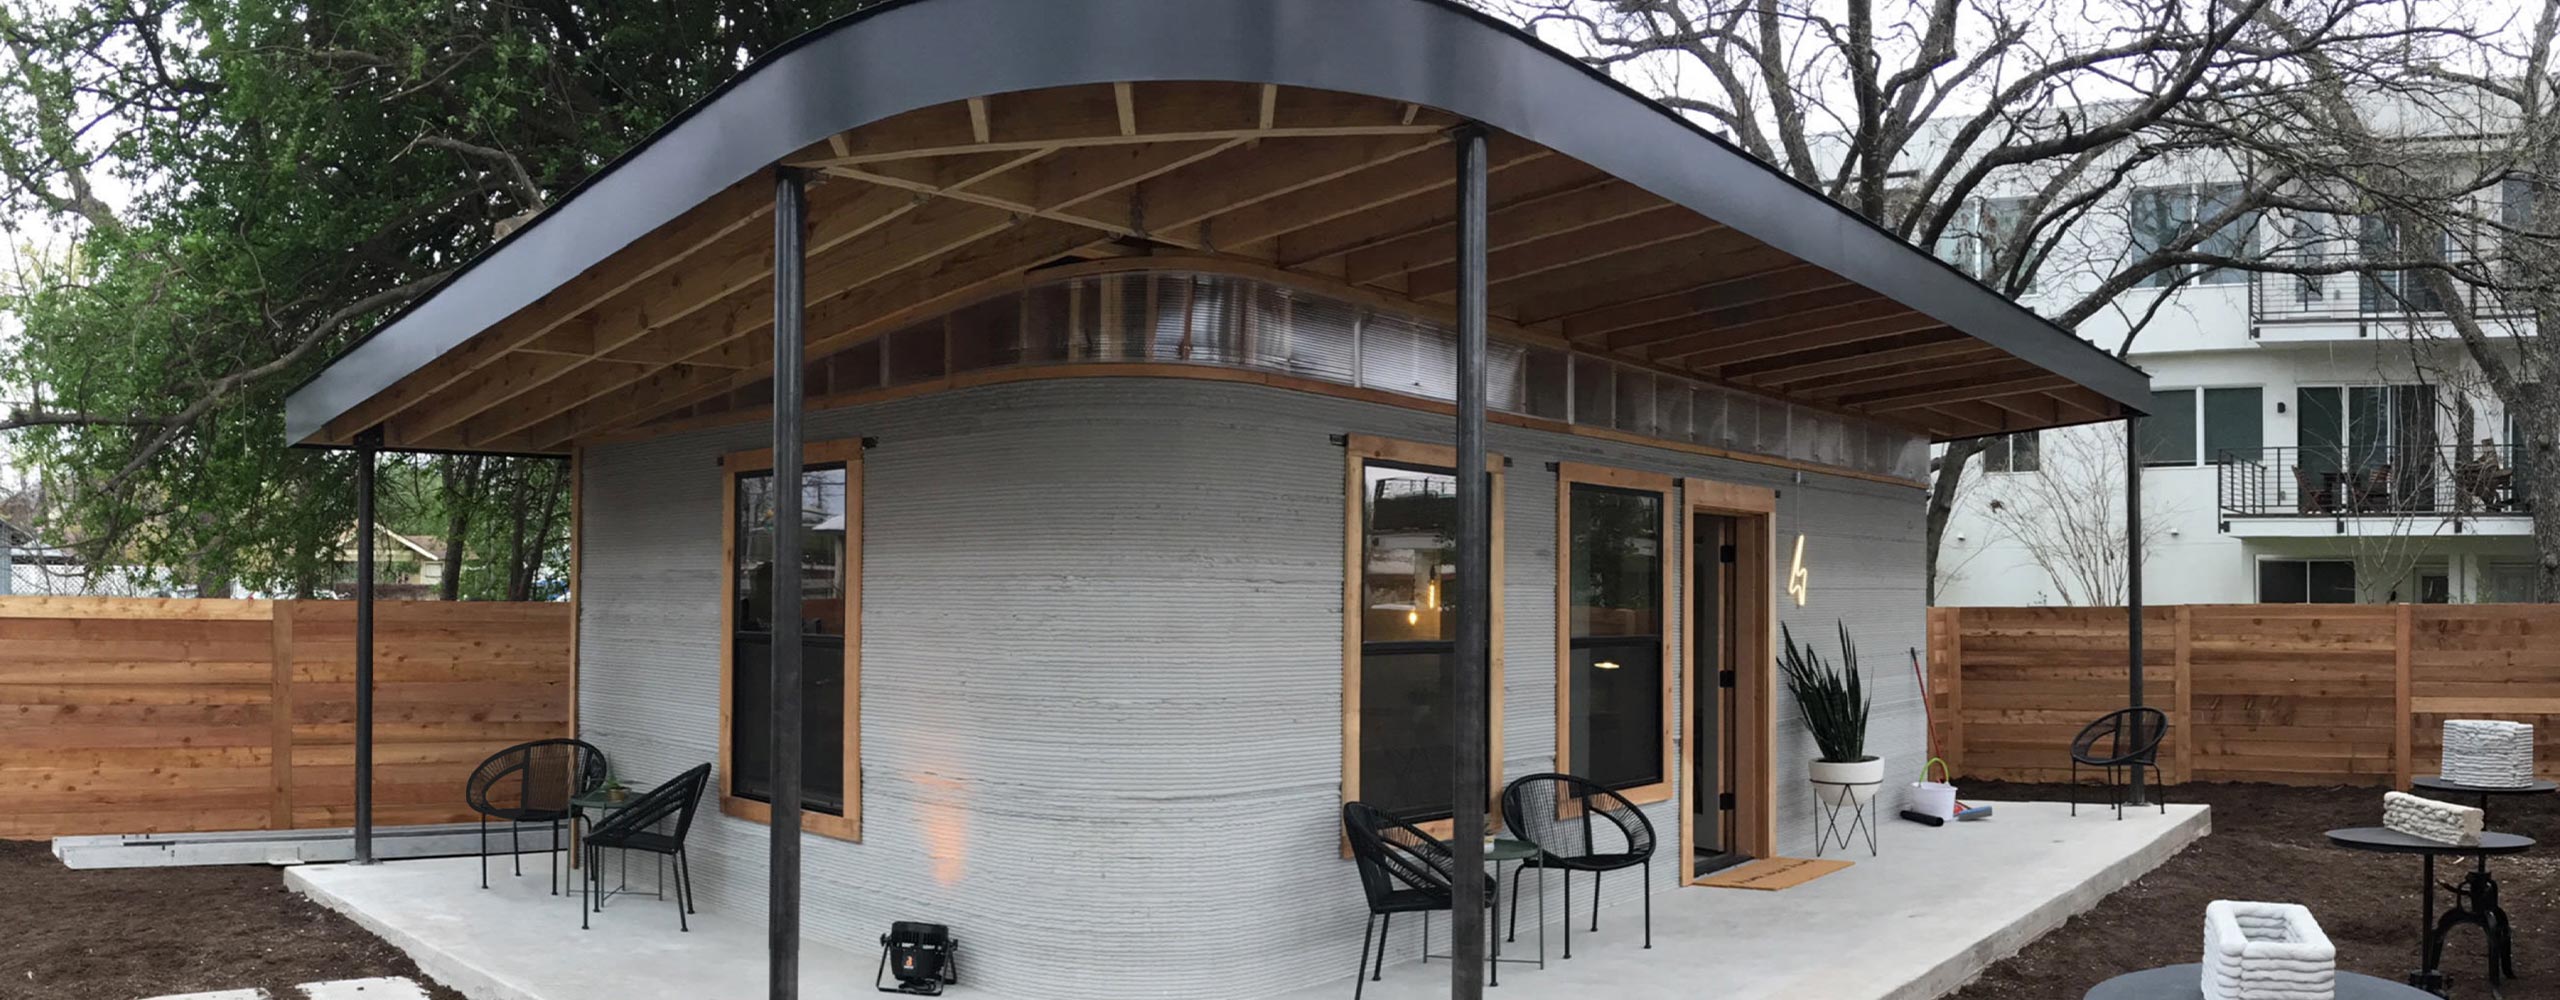
Usually when a startup walks through the door, the project they are pitching is a grand vision – not a refresh of an existing product or a refinement on feature in a larger assembly, but rather a bold vision that will form the basis of a company that will (hopefully) be a successful endeavor for years to come. The biggest idea (literally and figuratively) to come through the door at Pump Studios was the ICON Concrete 3D Printer, the first concrete printer to print a permitted home in the United States.
As with most startups, the ICON project had some unique and tight constraints that needed to be weighed and balanced against the complexity of the project as a whole in order to achieve a successful outcome. It is critical to determine a project’s goals and objectives from the start to create a realistic schedule and determine where there is flexibility in the design.
Following is a summary of Pump Studio’s development of the ICON Concrete Printer project.
August 2017 (Kickoff)
Any time you make a high-fidelity prototype, you are weighing the factors of quality, lead time, and price. These factors were amplified by the scale of the machine being made as well as an underappreciated fact that Austin has been in the midst of a construction boom for the last 10 years. Finding a vender capable of making the assembly for the right price within the specified timeline was one of the bigger challenges we faced on this project. The Pump team spent a considerable amount of time working with local fabricators to find a good fit for this project. As with all releases, we made sure the manufacturer had the necessary drawings and files. We worked closely with them to make sure everything was delivered in a timely manner.
Program Management (Schedule)
One of the key elements in product development is developing and maintaining a realistic project outline. This is critical for maintaining schedule, budget, and scope. A completely original design and implementation is the hardest type of project to scope a realistic schedule for because there are very few relevant projects that may be used as a guide for building the schedule. It requires a diverse set of experiences and some great educated guesses. Given the fixed timeline and budget for this project, we came up with the most realistic schedule we could with little to no margin for error:

As the above schedule indicates, there is no time for iteration and very little time to absorb unexpected issues and obstacles. Therefore, the design needed to focus on minimizing risk AND lead time for fabrication, assembly, and testing.
August 2017 – September 2017 (Design Phase)
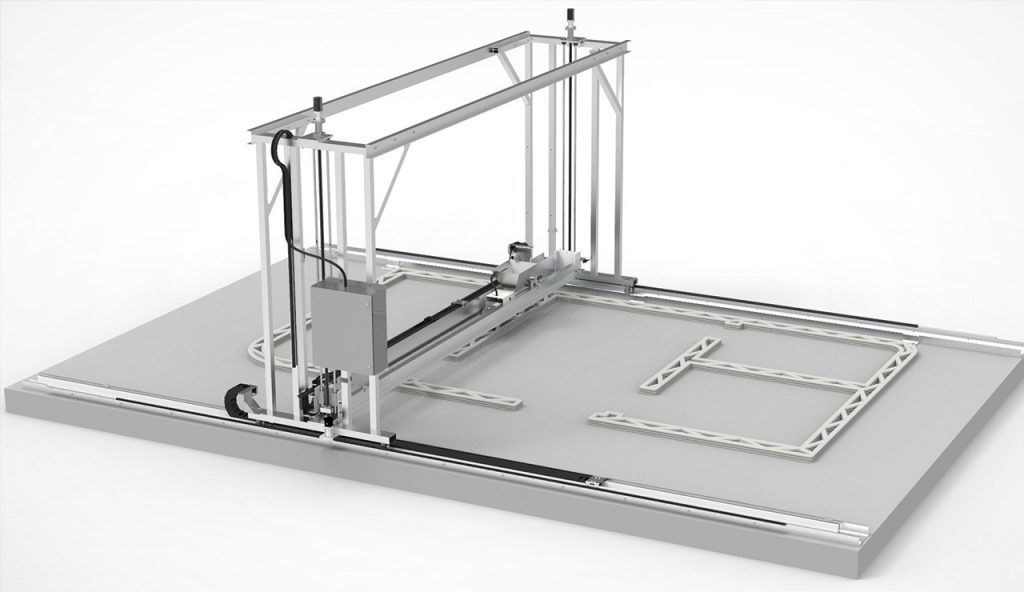
The design phase was a sprint to create a system that could be adjusted on the fly and require as little custom fabrication as possible. All the metal used in the frame is comprised of standard aluminum profiles. We worked with several key partners to define the initial set of assumptions that would guide the first design. The design partners included Yaskawa Electric Corp to size and scope the appropriate motors to move our system around, and Linestar automation to build the control cabinet and set up all the control systems to operate the machine. Finally, we worked with Logan Architecture and WJE to determine how large the building could be without causing functional issues with the machine.
We started with the following key assumptions:
- We would move a pump around as a print head (based on Alex’s first design). This would be analogous to the direct drive approach in desktop printing.
- We wanted to be able to print as tall as 9 ft.
- The machine needed to be able to be setup by two people.
- A lead screw would be used to adjust the vertical position.
- G-code would need to be custom rather than using an open source slicer like CURA (not enough control in those applications to define infill and machine paths).
- The entire machine would sit ON the slab to ensure proper leveling.
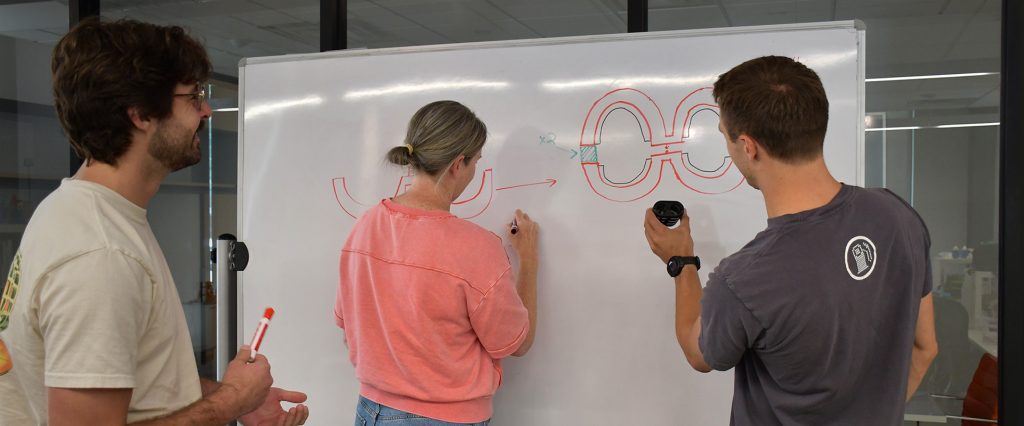
Defining the key assumptions has a huge impact on project direction and it is important to have clear goals and assumptions to get things moving quickly. Sometimes it is important to be able to challenge those assumptions as well. The most important thing is to keep the top line goals in mind and ask “Are we on track to meet these goals?” The rest of August and September was spent refining the machine to work with the requirements of the control group, as well as the motors and pump specified by Yaskawa and Alex.
* A unique risk with this project was that the parts, assemblies, and mechanisms were so large that it was nearly impossible to test and evaluate rougher models to build confidence before the big prototype release.
Late October 2017 (Prototype Production Release)
Any time that you make a high-fidelity prototype you are weighing the factors of quality, lead time, and price. These factors were amplified by the scale of the machine being made as well as an underappreciated fact that Austin has been in the midst of a construction boom for the last 10 years. Finding a vender capable of making the assembly for the right price in the right amount of time was one of the bigger challenges we faced on this project. The pump team spent a considerable amount of time working with local fabricators to find a good fit on this project. As with all releases we made sure that the manufacturer had the necessary drawings and files and we worked closely with them to make sure everything was delivered in a timely manner.

December 2017 (Prototype Production Assembly)
Whether it is a tolerance issue, how the parts get assembled, or how well it works in reality vs. theoretically, or even a fabrication issue, it is very common when receiving a first prototype to have some issues with the parts and assemblies and how they fit together. In this case, the prototype needed to be adjusted to perform the project’s ultimate goal to “Print a house by SXSW”. The biggest and unexpected hurdle in this process was actually getting all of the parts to put together a complete assembly that we could test and evaluate. As it turned out, the manufacturer of the custom lead screw was off on their delivery estimate by almost 4 weeks. That eats up a lot of time for testing and evaluation. These are the make or break moments in a project, and how you respond will be the difference between success and failure. Because there was a lot of testing and tuning that needed to be done to get successful printing, we started using the machine without the ability to adjust the Z height.
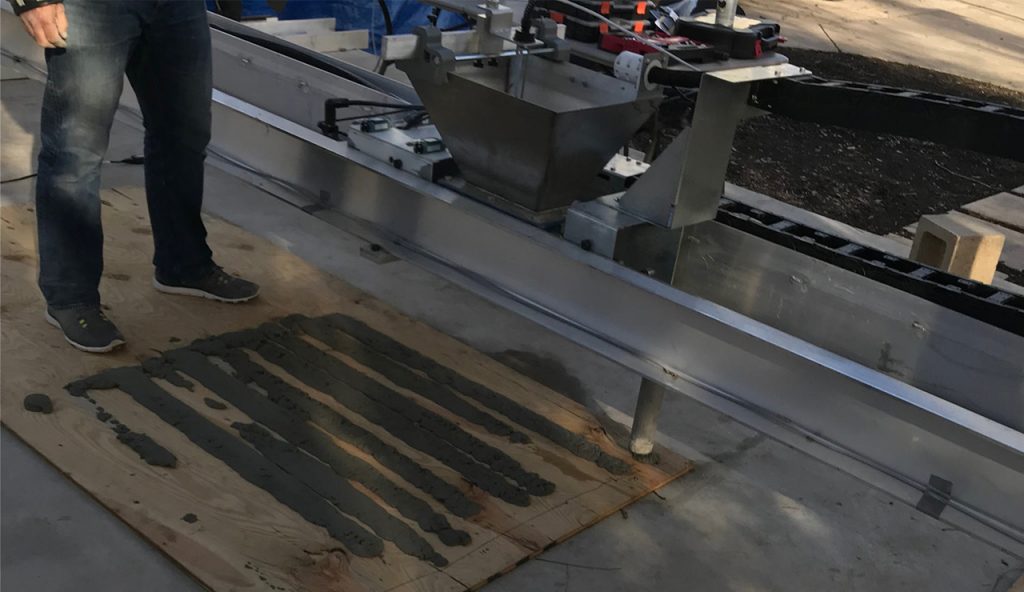
January 2018 (Print testing)
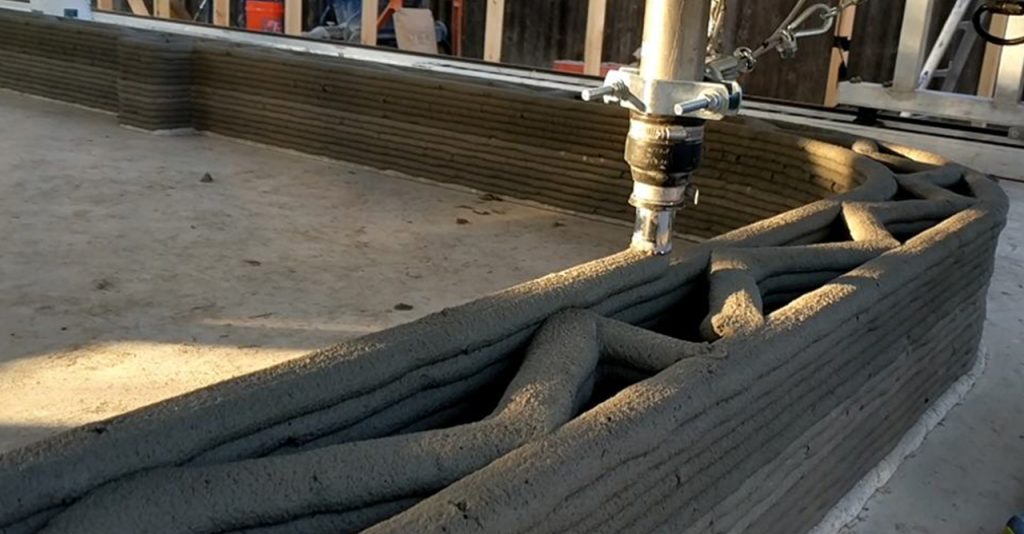
Testing is one of the most important steps when working with any prototype. With a machine that has so many systems and moving parts there are a lot of things to test, but first and foremost a 3D printer needs to be able to deposit a consistent layer of material that can hold its shape and remain consistent in its performance. Pumping concrete for this application proved to be a lot more challenging than a typical concrete pumping exercise because the material needs to exit the pump a lot thicker than usual in order to hold its shape and support the weight of layers that are added above it. Determining the correct ratio of water to the cement mixture became a critical exercise in calibrating the machine. Variables such as temperature, humidity, and pumping speed all played a big role in how things performed.

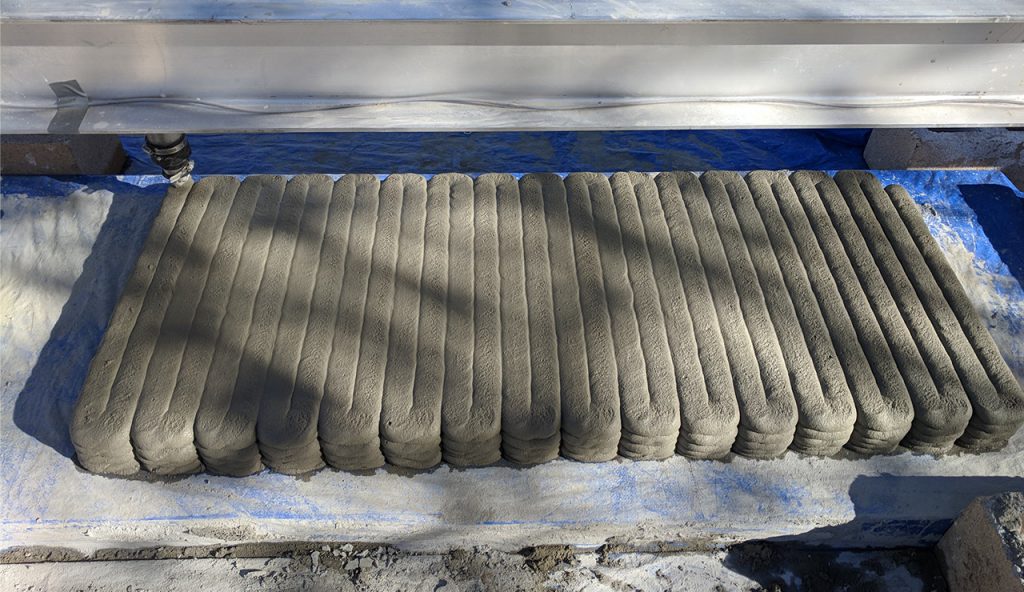
After a few weeks of testing the material we saw a significant improvement in the performance of the printing.
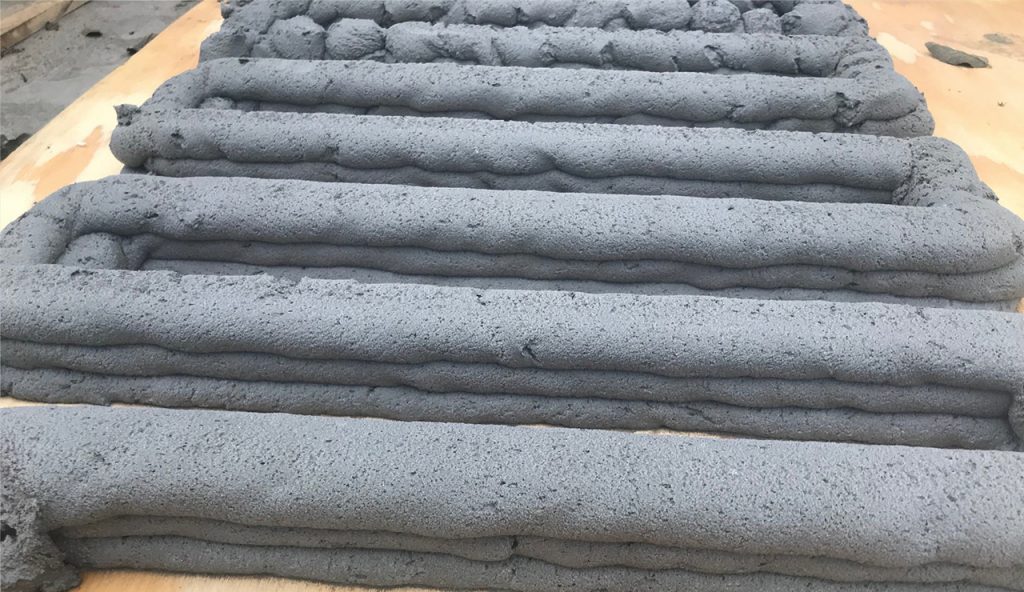
With time winding down, we continued to improve the characteristics of the print speed and material performance until we were finally achieving a consistency that we felt confident in printing a whole structure with.
February 2018 (Print)
After improving the print quality and performance throughout January, the decision was made to start printing the house in the beginning of February. The plan was to print as quickly as possible, but to try and provide some time to adjust for any problems along the way. A demonstration of the printing technology in February simulated some of the harshest conditions that might be encountered while operating this machine. February 2018 had a fair number of cold days as well as a lot of days with rain. Out of an abundance of caution, we constructed a covering for the machine so that rain would not cause delays or adversely affect the printed concrete. When you are printing on a slab you have one shot at getting it right. If there is a major print issue halfway through the construction process, it is not possible to simply start over.
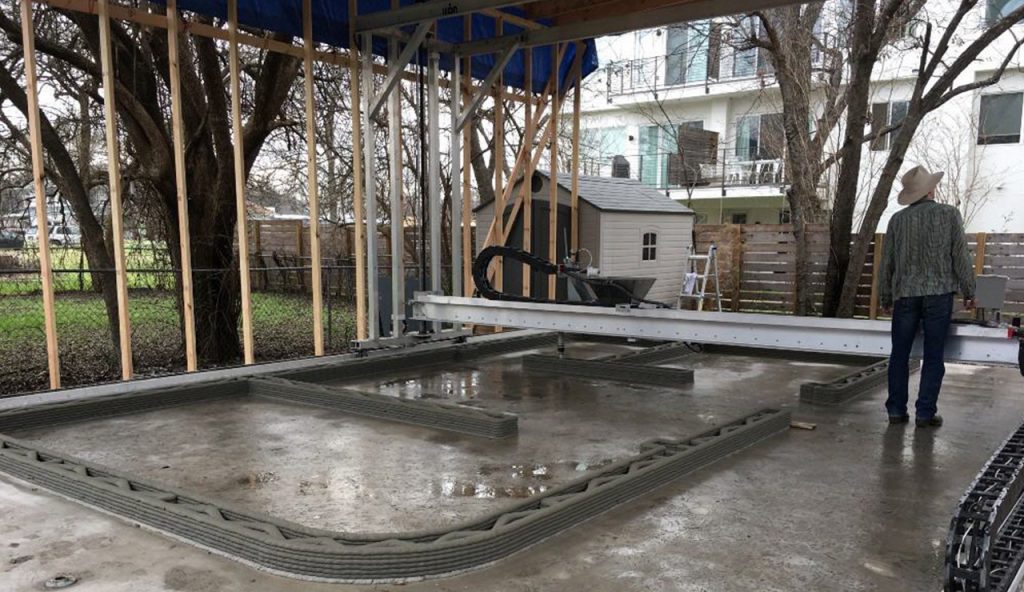
One of the challenges when doing something for the first time is that there is no “Maintenance Schedule” or “Standard Operating Procedures”. During the first test prints and the printing of the house, we learned a lot about how long you could run the first machine, as well as how the equipment needed to be cleaned to keep it performing at a high level. These hard lessons were invaluable for improving the reliability of this machine and future machines.
Late February / Early March
Any audacious schedule and deadline require an all-hands effort to be successful. The Pump team put in long hours in the evening and on weekends to assure the success of this project. It takes a personal commitment to the client and project to achieve that success. It is a point of pride for us to do everything possible to help our clients succeed!


As a result of our efforts and the efforts of the whole team, we were able to achieve the goal of printing the first 3D permitted house in the United States in just seven months! As a result, Icon was able to raise $10 million of series A funding and has gone on to be one of the global leaders in the industry.
Interested in seeing how we can help with your big idea? Reach out to us at info@pumpstudios.com or call us at 512-628-0921.
Pump Studios is a product design engineering firm that works with growing companies to ensure products perform exceptionally well and succeed in the market. Our strength lies in our experience and ability to tailor services to each client individually.